Ninja Foodi Chili is the best way to make deliciously cozy chili that tastes like it has been made in the slow cooker or on the stove all day! Simple to throw together and loaded with veggies, this healthy pressure cooker chili recipe will be your new go-to chili recipe for game day or for a quick weeknight meal. From fridge to table in only 45 minutes!
Jump to:
- What You Need to Make this Pressure Cooker Chili Recipe
- Ingredients for Making Veggie Ninja Foodi Chili
- How to Make This Instant Pot Chili Recipe
- Step 2 - Add the Remaining Ingredients
- What Are Some Good Toppings for Chili?
- What is the Best Way to Serve Chili?
- Make Ahead, Storage, Freezer, and Reheating Tips
- Other Expert Tips
- Other Recipe FAQs
- Other Ninja Foodi and Instant Pot Recipes You Will Love!
- Ninja Foodi Chili (Pressure Cooker Chili Recipe)
What You Need to Make this Pressure Cooker Chili Recipe
Here are the top 5 reasons why you need to make this electric pressure cooker chili recipe:
- Ninja Foodi Chili is an easy recipe to make and your entire family will love it!
- This healthy chili recipe is full of veggies, filling, hearty, and full of fiber.
- It can be made vegetarian, vegan, or with ground meat like ground turkey, bison, ground chicken, or beef for added protein.
- It is made in a fraction of the time in the pressure cooker, Ninja Foodi, or Instant Pot.
- It's the perfect make-ahead recipe for chilly days, game days, or a quick weeknight dinner for fall - just like our bone broth chicken soup!
Ingredients for Making Veggie Ninja Foodi Chili
Here are the ingredients you need to make this recipe. Reference the recipe card at the bottom for exact measurements and the notes below for substitution ideas.
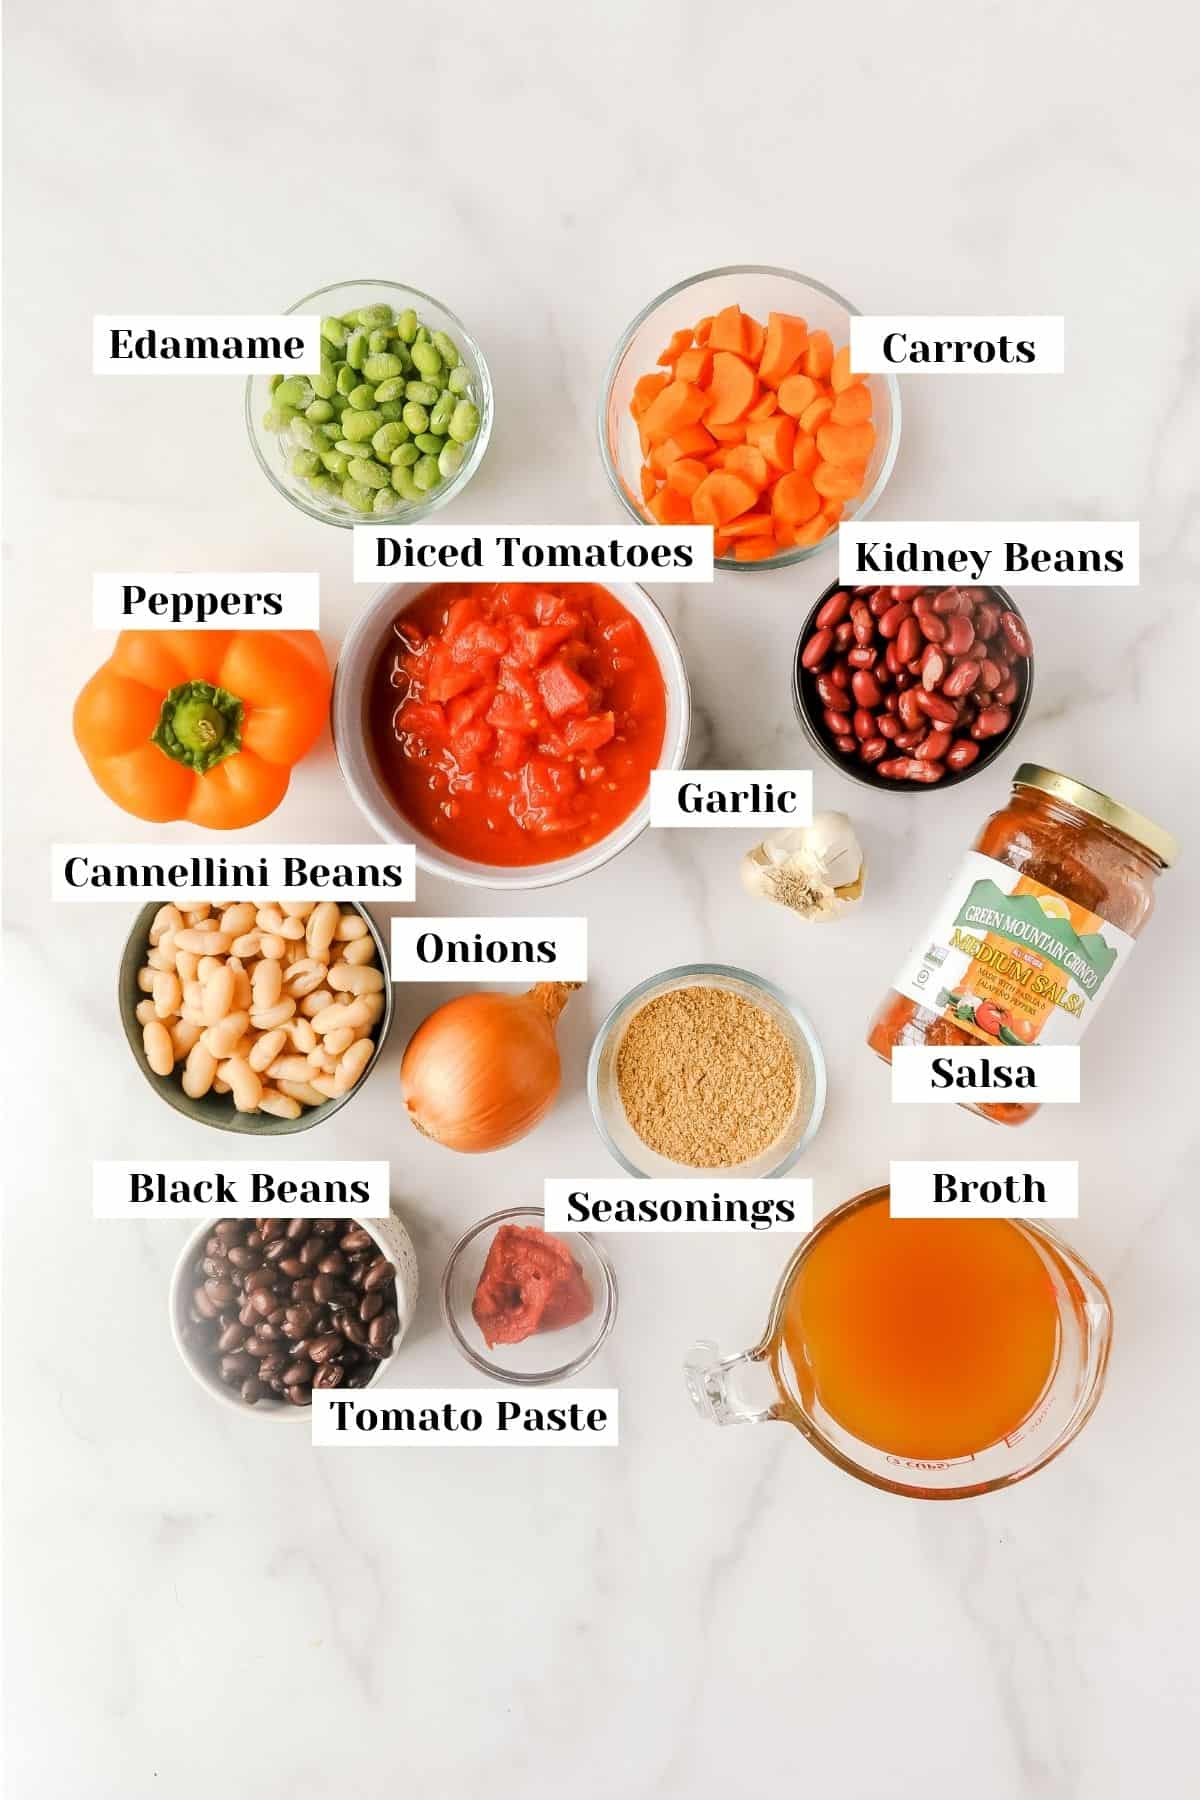
What Ingredients Make Chili Taste Better?
Vegetables like edamame, carrots, and bell peppers create a hearty chili recipe full of fiber and veggies.
Fresh or store-bought salsa gives this recipe a Southwestern flavor. Use mild or medium depending on the desired level of spice.
Canned black beans, red kidney beans, pinto beans, chili beans, and cannellini beans are the best beans for making chili and provide fiber and texture and help to thicken the chili.
Add in edamame for additional texture, flavor, fiber, and protein.
Vegetable broth, chicken broth, or beef broth combined with canned diced tomatoes, Rotel, or tomato sauce helps to create a rich broth.
Chili Starter Ingredients
Fajita seasoning (or taco seasoning or chili seasoning) is the base of the chili starter flavor.
Tomato paste helps to bring the starter together and will work to thicken the chili.
Garlic and onions provide flavor and fragrance to the starter.
How to Make This Instant Pot Chili Recipe
Below are step-by-step instructions for how to cook this recipe. The recipe card at the bottom shows the exact cooking time and temperatures.
Step 1 - Make the Chili Starter - the Secret to Making Good Chili

Drizzle extra virgin olive oil into your Ninja Foodi pot and turn it on the saute function. Sauté the onions for two minutes and then add the garlic for 1 minute.
You can also add in the carrots and peppers at this time if desired.
Add in ½ of the spices for 30 seconds and then the tomato paste and stir the bottom of the pot for 30 seconds. Add in 1 cup of vegetable broth and scrape up the bits before canceling the sauté setting.
This extra step is completely worth it as it really helps to soften the onions and open up those delicious southwestern flavors.
You can even make the starter ahead of time and freeze it for when you want to make chili.
Step 2 - Add the Remaining Ingredients
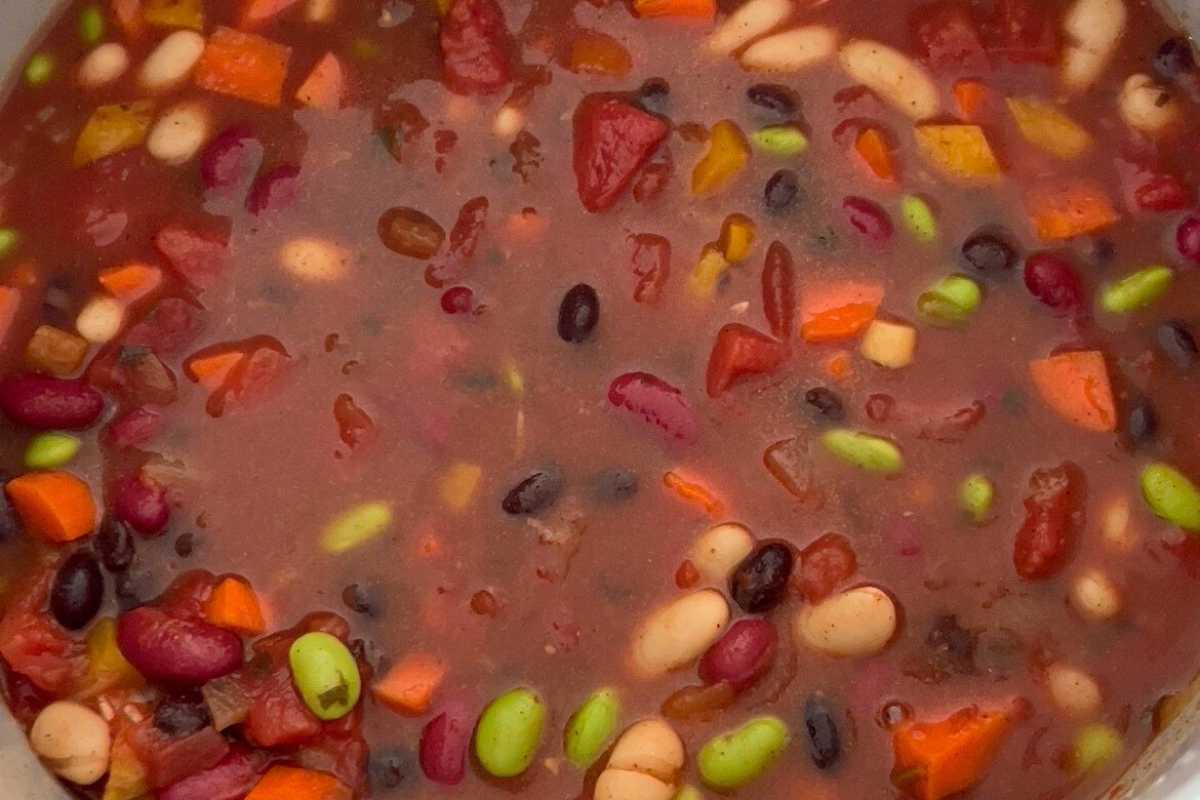
Once you have the starter completed, add the remaining ingredients to the pot and give it a good stir. Pressure cook on manual high pressure for a cooking time of 12 minutes.
Carefully do a quick release and allow the pressure cooker chili to set up for about 15-20 minutes before serving. Or, use a natural release to allow the chili to set.
Does Chili Get Better the Longer It Sits?
Chili thickens as it cools, especially when it's made in a pressure cooker. This is a great recipe to make a few days ahead of time as the flavors develop even more the longer it sits.
This thick soup recipe has delicious flavor on the day you make it and even better taste, flavor, and consistency on days 2 and 3.
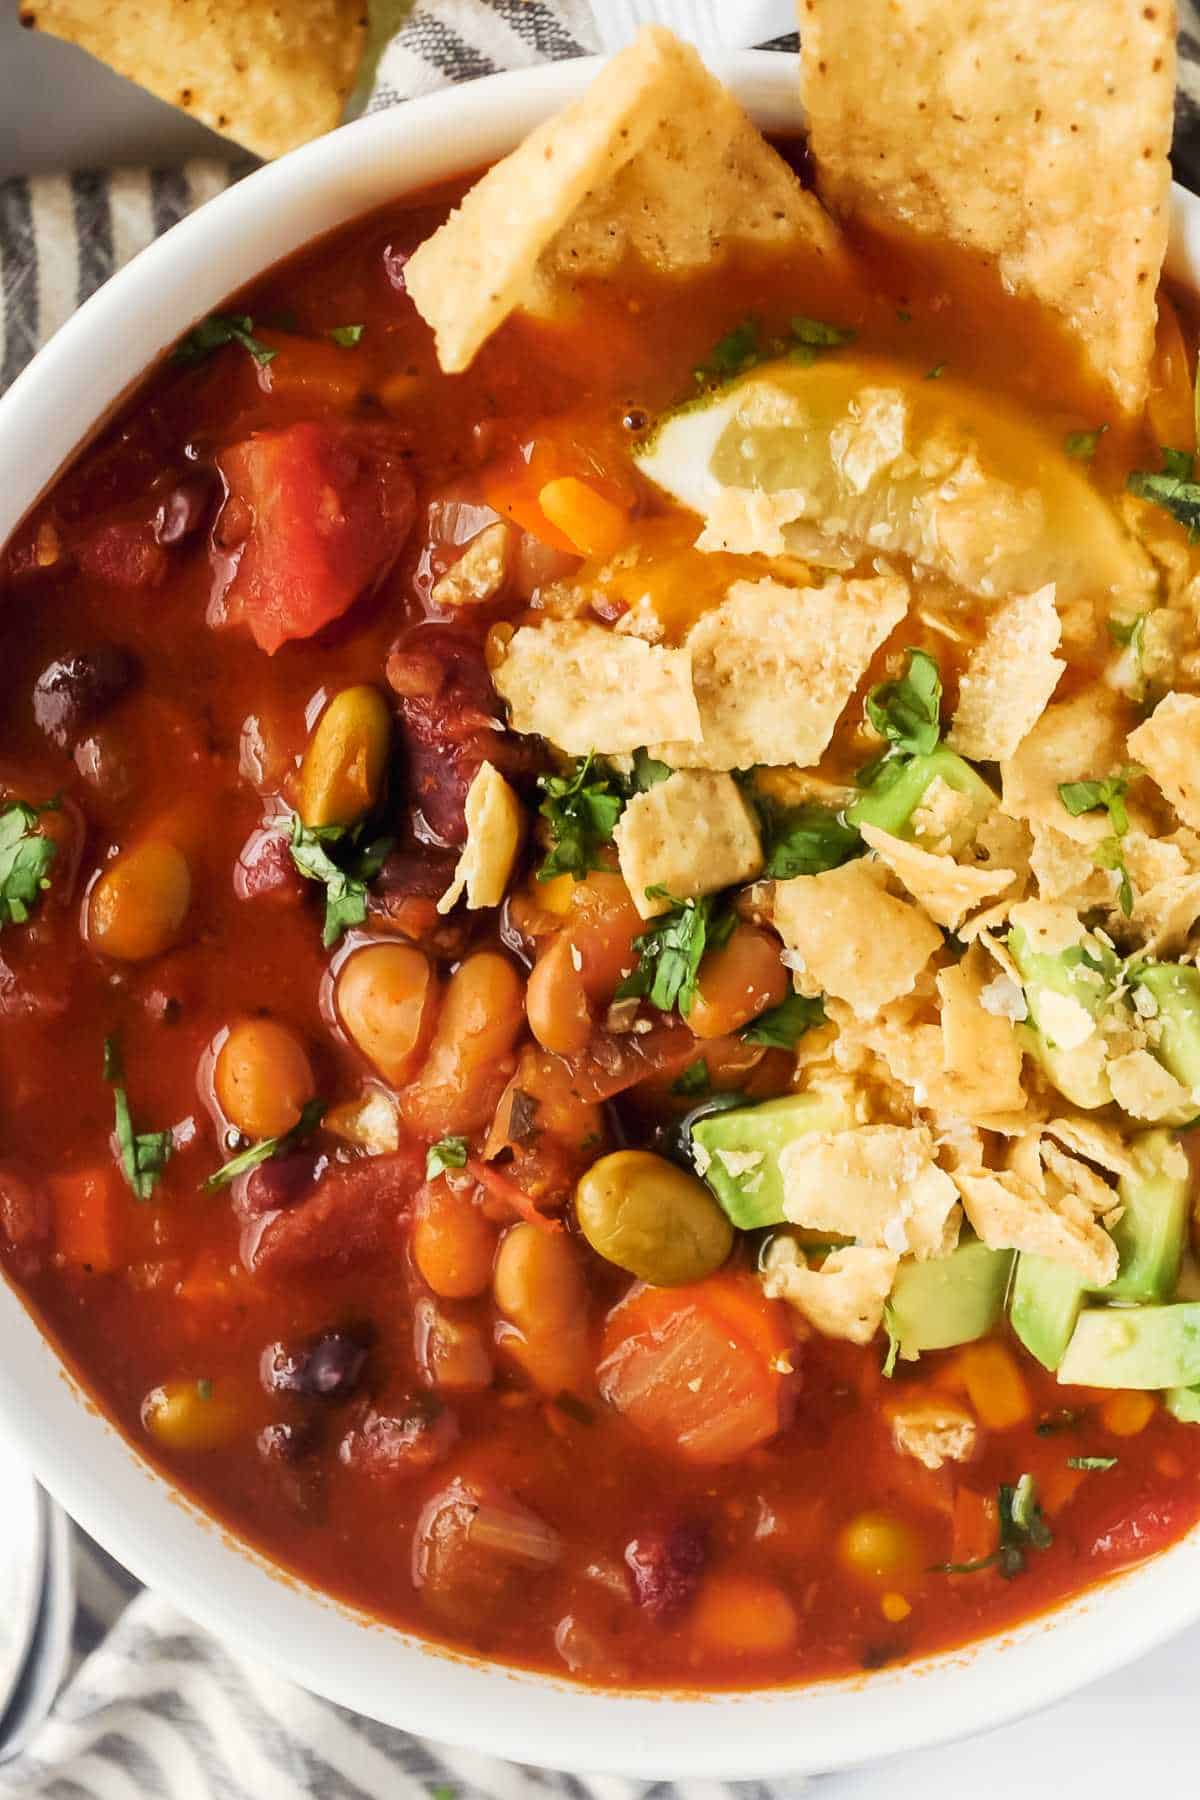
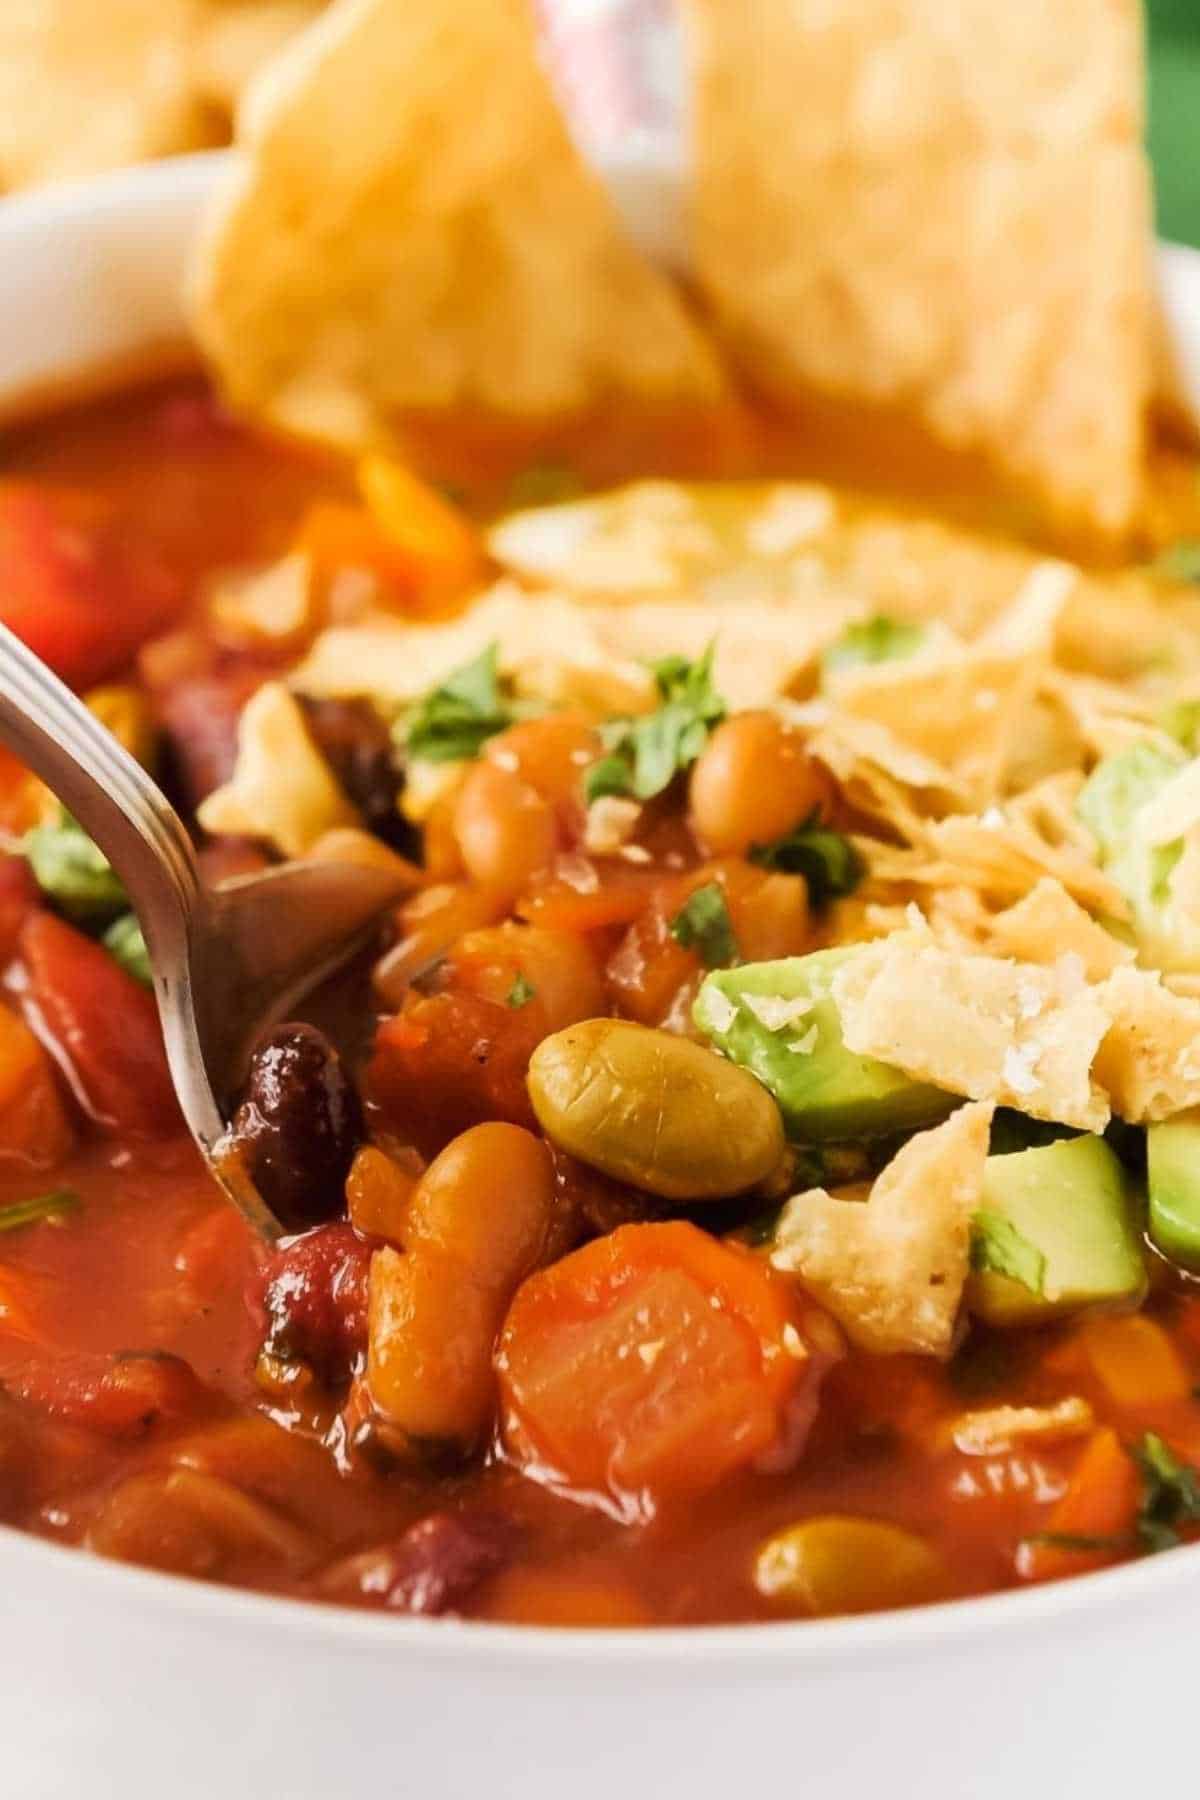
What Are Some Good Toppings for Chili?
- Avocado or guacamole
- Tortilla chips or strips
- Green onions
- A dollop of sour cream of Greek yogurt
- Cilantro
- Shredded cheddar cheese
What is the Best Way to Serve Chili?
Chili is best served hot with loads of toppings. You can serve it with cornbread and you are set with a delicious chili your whole family will love.
Top cooked macaroni with Ninja Foodi chili to make an easy chili mac recipe.
Top a baked potato with this delicious chili recipe!
Make Ahead, Storage, Freezer, and Reheating Tips
- Make ahead: Make ahead up to 4 days in advance. I find this chili recipe actually tastes better on the second and third days!
- Storage: Store leftovers in an airtight container for up to 4 days in the refrigerator.
- Freezer: Ninja Foodi chili can be made ahead, chilled, and frozen in freezer-safe containers for up to 3 months.
- Reheating: Reheat in the microwave or on the stovetop until heated through.
Other Expert Tips
- Add enough liquid to the bottom of the Instant pot and scrape up any browned bits from the starter to avoid the burn notice.
- Make it spicy by using medium or hot salsa. You could also add in jalapeños, chili peppers, chipotle peppers, hot sauce, red pepper flakes, or cayenne.
Other Recipe FAQs
If the chili seems too thin add in some cornstarch, flour, or arrowroot to thicken it prior to eating.
This recipe is easy to make on the stovetop. Heat oil over medium heat in a cast iron pot or large soup pot. Add onions and cook for 2 minutes. Toss in garlic and cook for one minute.
Add ½ packet of the fajita seasoning and tomato paste and stir constantly for 30 seconds. Pour in ½ of the liquid to scrape up any bits.
Add remaining ingredients, reduce heat to simmer, and allow to cook for 30 minutes.
You can make this veggie chili in the crock pot too.
Follow stovetop instructions through making the chili starter. Add the remaining ingredients to your slow cooker and slow cook on low for 6-8 hours or high for 2-3 hours.
Other Ninja Foodi and Instant Pot Recipes You Will Love!


If you've made this recipe, would you please leave a star rating and comment below on the recipe card? If you want more simple + delicious eats, please subscribe to my newsletter and follow along on Facebook, Pinterest, and Instagram for the latest updates.

Ninja Foodi Chili (Pressure Cooker Chili Recipe)
Equipment
- Instant Pot, Pressure Cooker or Ninja Foodi
Ingredients
- 2 cups salsa
- 1 cup edamame
- 2 medium carrots chopped
- 1 medium orange bell pepper chopped
- 1 small onion chopped
- 4 cloves garlic grated
- 1 can diced tomatoes 15 oz.
- 1 can cannellini beans rinsed
- 1 can kidney beans rinsed
- 1 can black beans rinsed
- 1 tablespoon tomato paste
- 2-3 cups vegetable broth
- 1 tablespoon olive oil
- 1 packet fajita seasoning
Instructions
Ninja Foodi, Instant Pot, or Pressure Cooker Instructions
- Add olive oil to pressure cooker pot and turn to saute mode. Cook onions, carrots, and peppers for 2 minutes, and then add garlic. Cook for 1 minute.2 medium carrots, 1 small onion, 4 cloves garlic, 1 tablespoon olive oil, 1 medium orange bell pepper
- Add ½ of the spice packet along with the tomato paste and mix for 30 seconds. Add one cup of vegetable broth and scrape the bits off the bottom of the pan. Cancel saute mode.2-3 cups vegetable broth, 1 packet fajita seasoning, 1 tablespoon tomato paste
- Add remainder of ingredients into pot an stir. Turn valve to sealing and set to manual mode for 12 minutes. Allow a natural release of 10 minutes. Serve hot and enjoy!2 cups salsa, 1 cup edamame, 1 can diced tomatoes, 1 can cannellini beans, 1 can kidney beans, 1 can black beans
Stove Top Instructions
- Make chili starter: Heat oil over medium heat in a cast iron pot or large soup pot. Add onions and cook for 2 minutes. Toss in garlic and cook for one minute.
- Add ½ packet of the fajita seasoning and tomato paste and stir constantly for 30 seconds. Pour in ½ of the liquid to scrape up any bits.
- Add remaining ingredients, reduce heat to simmer, and allow to cook for 30 minutes.
Crockpot Instructions
- Follow stovetop instructions through making chili starter. Add remaining ingredients to your slow cooker and slow cook on low 6-8 hours or high 2-3 hours.
Notes
- To thicken: If the chili seems too thin add in some cornstarch, flour, or arrowroot to thicken it prior to eating. It will thicken as it cools and I've found it to be a great consistency on days 2 and 3.
- Make ahead: This recipe is excellent to make ahead for an entire week of meals! In fact, I find this chili recipe actually tastes better on the second and third days!
- Storage: Store leftovers in an airtight container for up to 4 days in the refrigerator.
- Freezer: Ninja Foodi chili can be made ahead and frozen in freezer-safe containers for up to 3 months.
- Reheating: Reheat in the microwave or on the stovetop until heated through.


Michelle Lange
The fact that you add the measurements of the ingredients in the directions is a game changer. It is so hard to keep going back for the amount and this save so much time. It makes my life so much easier and this is the exact hearty recipe I have been looking for for my family. We loved it! loaded with veggies and flavor we added ground turkey and it was soooo good!!!
Lyndsey Piccolino
Thanks so much for that feedback Michelle! I'm so glad it helps! Thanks so uch for your 5-star review!
Sue
I am in the process of making this right now for dinner for tomorrow! I am using my crockpot and it smells so yummy! Hubby wants to know why he can’t eat it now, lol! Will this freeze well? This is going to be way too much for the 2 of us! I plan on vacuum sealing it and then freezing so I hope it is ok!
Lyndsey Piccolino
Hi Sue! Yes it freezes very well. I honestly like it even better the next day when the flavors have a long time to sit together. Enjoy!